
Cache memory is beneficial for many reasons. It stores data so you don't have to enter it again, remembers your preferences, and helps the software and websites you use frequently load faster. However, this memory can also get corrupted, causing problems or taking up an undesirable amount of storage.
Like your Internet browser, clearing the cache in Windows is a great step for troubleshooting issues and recovering drive space. The following sections contain steps to clear the cache in various areas of Windows 10 and Windows 11.
Clear temporary files in System Settings
Clearing out the temporary files in Windows can free up a significant amount of space. Select your version of Windows in the list below and follow the steps.
Windows 11
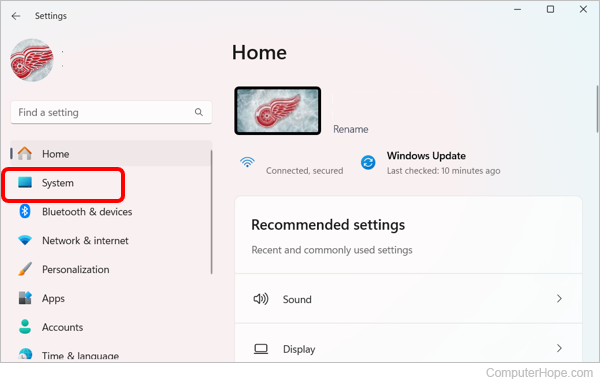
- Press the Windows key, type Settings, then press Enter. Or, press the keyboard shortcut Windows key+I.
- In the Settings window, click System in the navigation menu on the left.
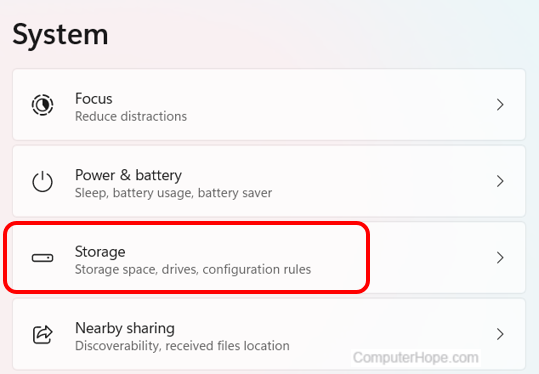
- On the right side of the screen, scroll down and click the Storage option.
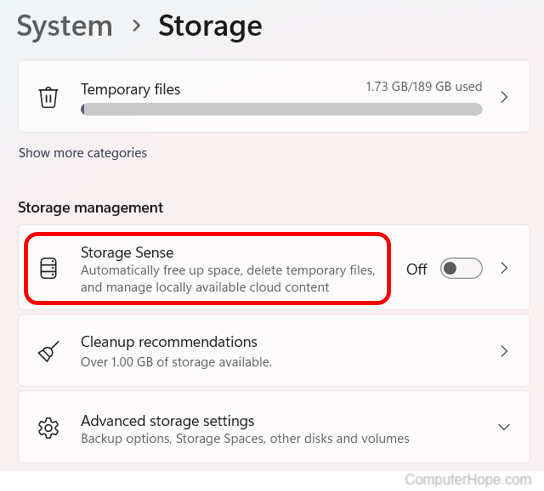
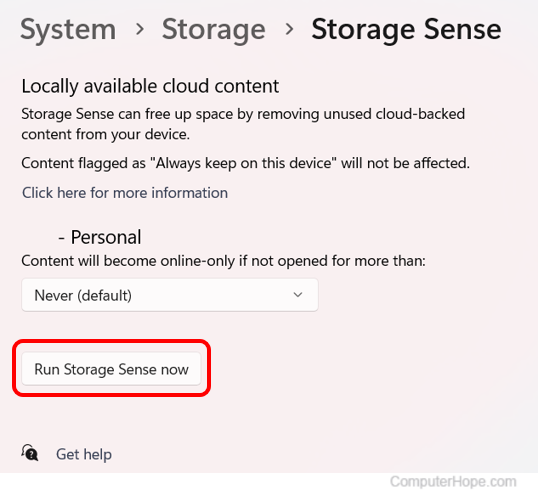
- In Storage settings, scroll down and click the Storage Sense option.
- In the Storage Sense settings window, click the Automatic User content cleanup toggle to the On position.
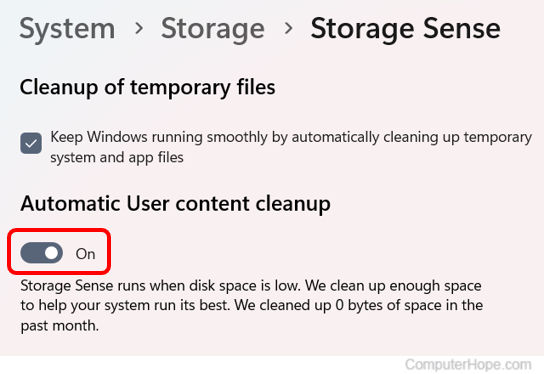
- Scroll to the bottom of the Storage Sense settings window and click the Run Storage Sense now button.
Windows 10
- Press the Windows key, type Settings, then press Enter. Or, press the keyboard shortcut Windows key+I.
- In the Settings window, click System.
Post a Comment